by Meredith
8. August 2009 12:30
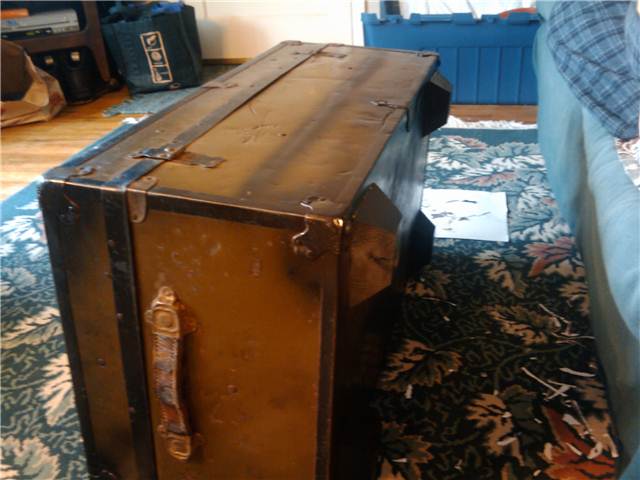 I hit a local Goodwill a couple of weeks ago because I was looking for a cheap stool or table to use as a plant stand. Didn't find a table but I found a killer deal on a trunk. I picked up a smaller trunk that they only charged me $3 for! I wasn't totally sure what I was going to do with it, but for $3, all my guilt regarding the purchase went out the window. :)
For the first step, I needed to clean off the outside. The trunk is lined in metal and most of the bottom had rusted. With the trunk outside, I sanded down the surface, wiped it clean and then gave it a good coat of black spray paint over the rusty spots. I decided to turn the trunk into a coffee table and bought some simple wood finial-things from Home Depot to use as feet. I sanded and sprayed those black as well. Later when paint was dry Hunter used some Gorilla glue and glued the feet onto the bottom.
The inside of the trunk had contact paper that was dirty, stained and was peeling off in places. I spend a couple of hours with a spackle knife and scraped the inside surface as smooth as I could get it. I then applied fresh contact paper to the inside. Man that was a bitch. Not a perfect application, but whatever, it's on there now and the whole inside surface is now clean and fairly smooth. :P
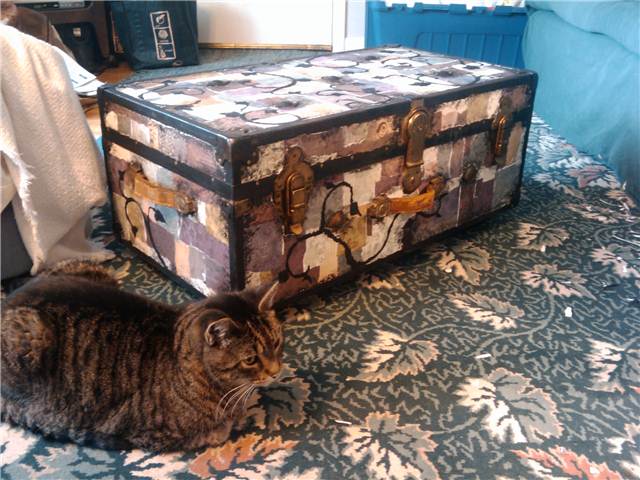 For the outside, I bought a bunch of scrap booking paper, tore it up into strips and then used watered down Elmer's to decoupage the surface…just like plain old paper mache. :) Once the surface was covered I tore up strips of black paper napkins and made ivy swirls and leaves to go over the top. I like the patchwork look of colored paper, but wanted another pattern over the top to make it a bit more random and organic.
The black hardware still seemed a bit too much of a contrast to the colored patchwork so I used a balled up paper napkin and some black paint to sponge on some black shading around all the edges and hardware. For the final step, to bring some of the original brassy/gold color back to the hardware, I painted the rivets with a dot of gold paint.
And yay refinishing is done! :) For final touches I still need to give the outside a top coat of some kind of sealant, as well as buy a piece of plexi-glass to set on the top. I also think adding a chain to the inside so that the lid doesn't open all the way would be nice too.
 Subscribe