by Meredith
10. October 2020 21:51
by Meredith
8. July 2020 12:45
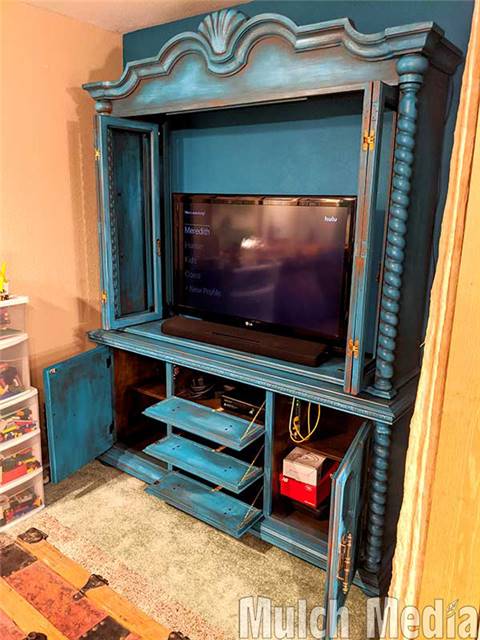
I love it! I still need to paint the glass panes with the antique mirror stuff. But we have it set up and are reconnecting the TV now. Not all of the game console stuff is hooked up yet but the internet works and the TV is connected so we can watch movies again. I was going to paint the hardware but couldn't figure out the right color so I decided to just put it back on and decide later. Turns out I like the color as is.
by Meredith
4. July 2020 22:42
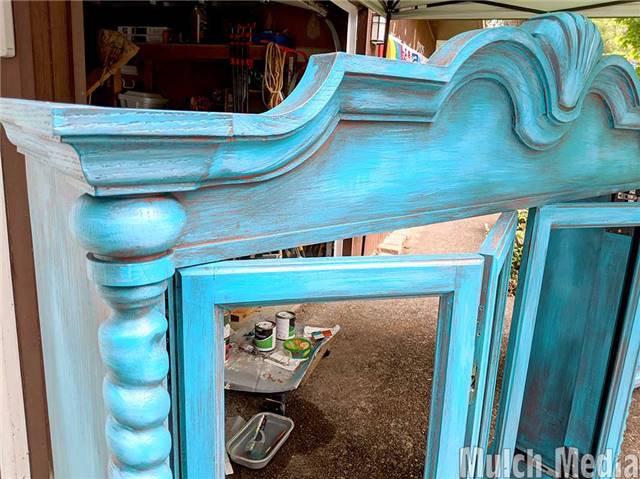
Further layers are all about blending. I'm going back and forth with adding a bit more of the orange where I want it more prominent and then dry brushing the blue over the top to tone it down. I think I'm going in the right direction. It has been taking a long time. The final layer of paint is a lightened version of the blue that I was adding as highlights to all of the raised areas of the woodwork.
by Meredith
3. July 2020 21:37
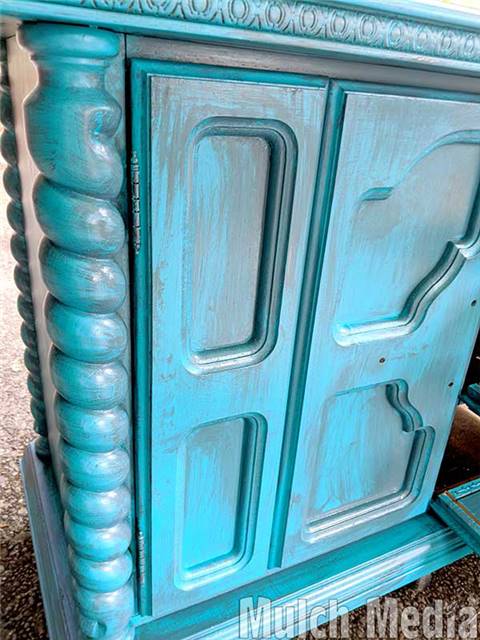
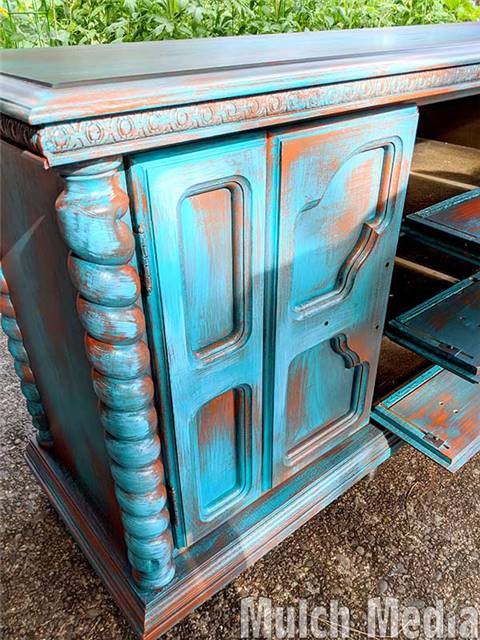
Layer #2 is a gray color that I made by mixing the blue with the rusty orange. I applied the color into areas that I thought would look best shadowed. The layers are fairly thin and the temperature warm enough that everything dried quickly so more layers could be applied. A 3rd layer was then to dry brush the orange. This is to create the worn off old paint effect.
by Meredith
2. July 2020 21:31
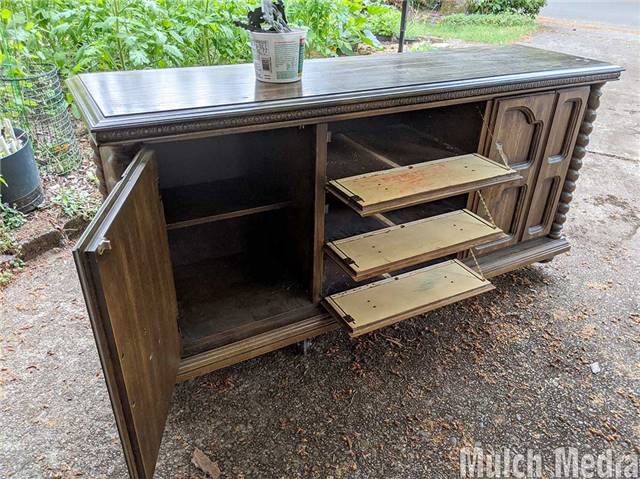
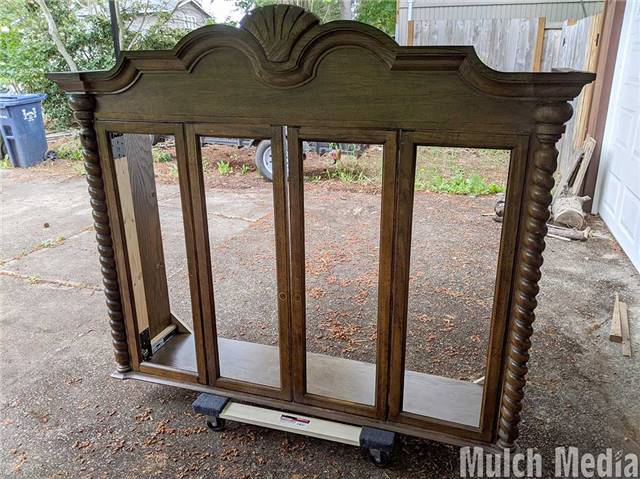
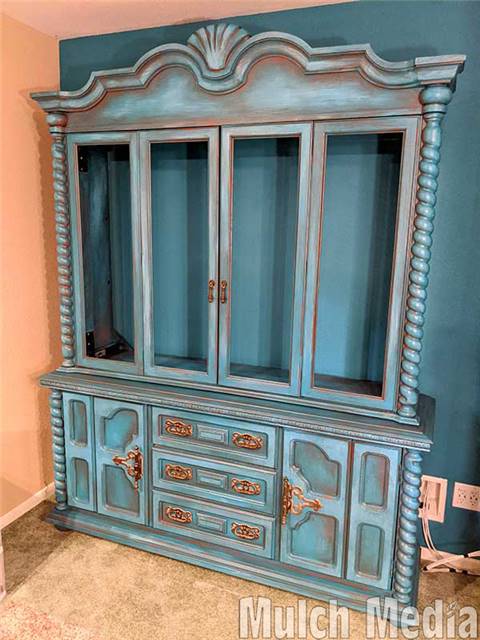
This old china hutch was a free piece of furniture we had acquired about 10 years ago. It is a solid piece of furniture that came as a set with our dining room table (also free) and for years just held some collectibles and office supplies. When the office space got a makeover we decided to turn this hutch into an entertainment center. I will have to make a separate post with the construction modifications, but Hunter deconstructed the top so that it would open completely and the doors would fold in and tuck away. Hunter also deconstructed the drawers so that they hinge and drop open for access to devices. The back is open so the TV will eventually be mounted to the wall.
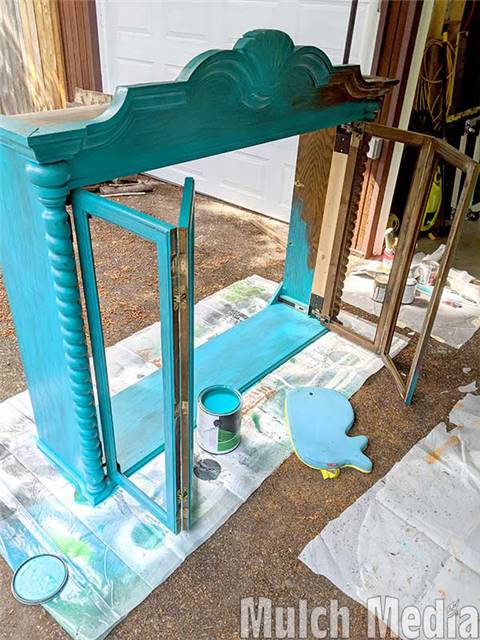 My job is to paint the project. I sanded and cleaned all the surfaces and then put a base coat of a primer/top coat combo of blue.
by Meredith
24. November 2019 09:15
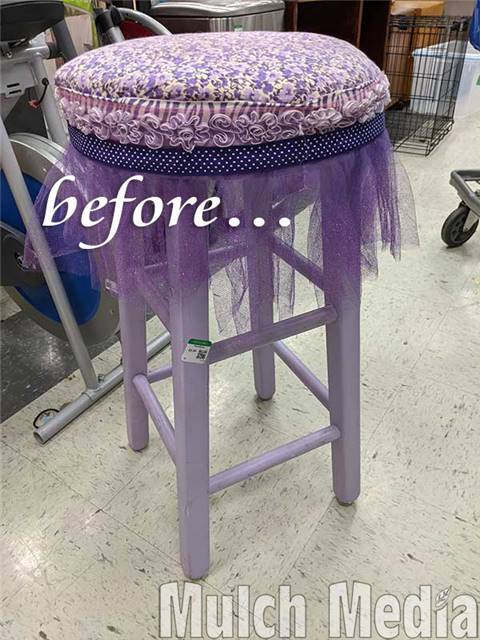 We built a little desk for Arianna and it needed a stool for her to sit on. I found something sturdy at Goodwill that would work with a little TLC. A little disassembly here, some paint there, and we have a winner!
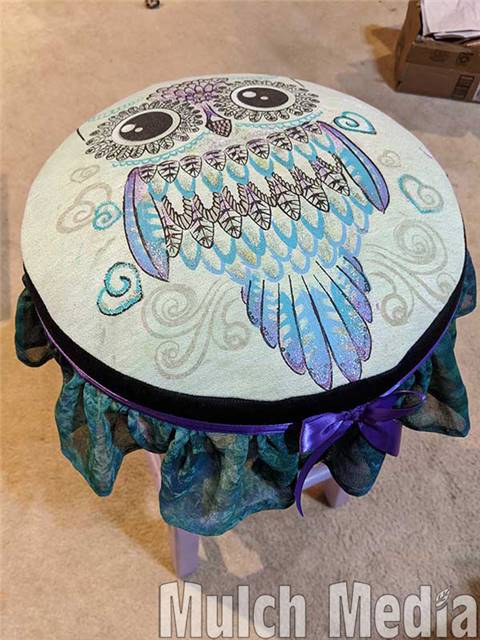
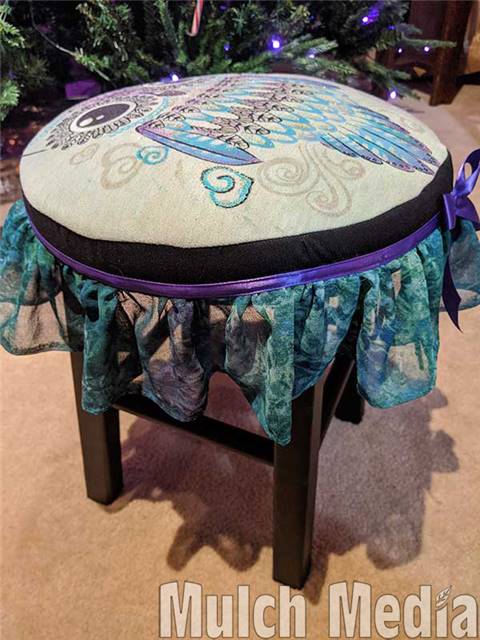
There was no way she could fit in this owl shirt any more. It was so well “loved” with paint and glitter on it from preschool that even if she would have let me donate it, it wouldn’t be accepted. Our solution was to turn it into a throw pillow. The stool ended up being the perfect project for the owl shirt. I just added more paint and glitter to make the preschool additions look more intentional. I then sewed it into a pillow with a bit of padding and trimmed with some scraps of coordinating fabric I had laying around. (She really liked the ruffle that was originally on the stool.)
Hunter cut the legs down to the right height (and repurposed the feet into a second footstool for the craft room!). I painted the whole thing matte black and I think it turned out super cute.
by Meredith
6. August 2017 17:50
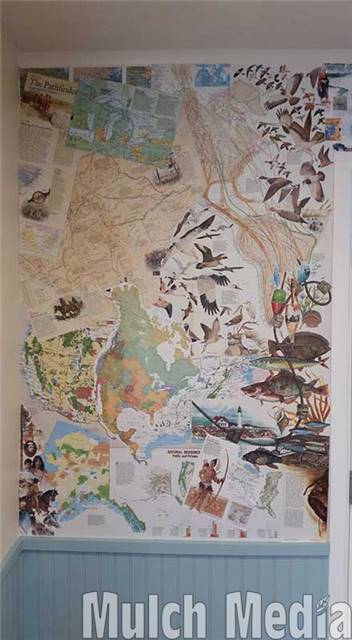
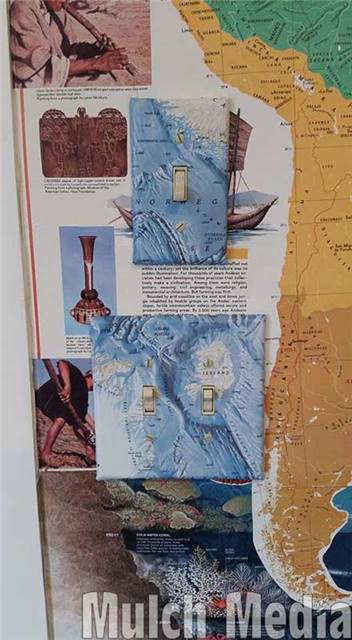
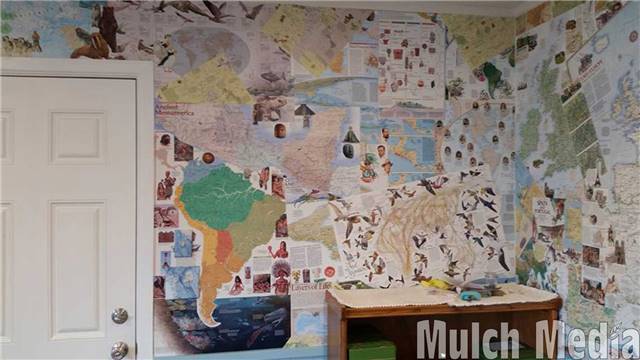
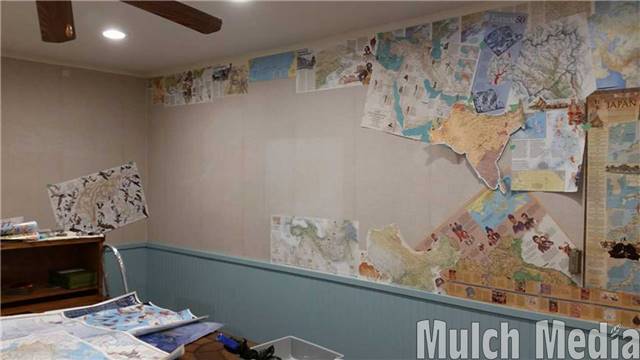
The maps were sorted geographically, starting with North America/US in one corner of the room, Canada above the door, then onto Central and South America. The next wall crosses the ocean to Europe, Africa, Asia, and the Arctic around the door. Even the light switch plates are covered. A significant amount of wallpaper paste was used to adhere these maps but I am wondering if I should apply a top coat of some sort to protect the whole thing.
by Meredith
5. August 2017 14:45
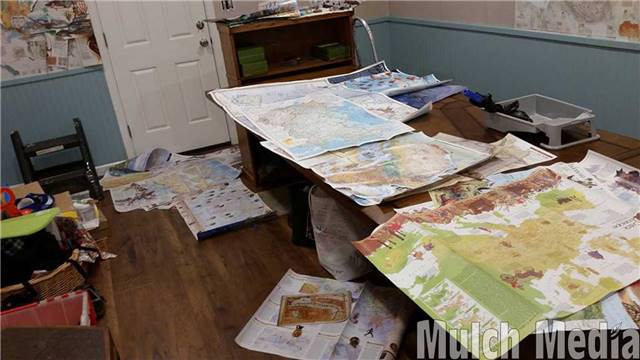
My parents had a subscription to National Geographic for decades. When it was time to clear out the collection we saved the maps and turned them into a wallpaper project. The steps were to layout all the of maps into a general area. I then started overlapping and taping them into place each piece, cutting out the parts of the maps that I wanted. As I worked and finished up a section, my mom would come in behind me and start pasting down the map pieces. This was challenging when sections were taped together. The paste also would cause the map paper to wrinkle if it got too wet so some layers had to be done in sections, hours apart to allow for the bottom layer to dry first before the upper layer could be applied. It took two, very long days to complete.
by Meredith
9. July 2017 11:43
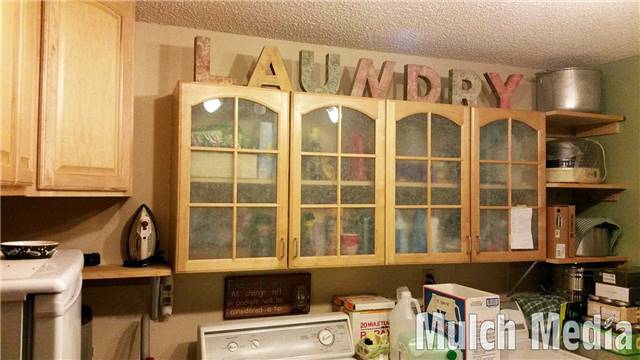
 I'm calling the project done (for now). I found most of the "LAUNDRY" letters on discount at a craft store. I was missing an "N" and "R" but some creative surgery fixed that. More scrapbook paper and paint to match the colors in the room and they are good to go.
Hunter got the last shelf put in. We've done just about all there is to do in this room of the house...for now. A future project is to tile the counters and maybe replace the sink. But the room is painted, laundry signs are up, and everything has its own storage space (especially after I finish putting things away). On to the next room!
by Meredith
24. January 2017 08:38
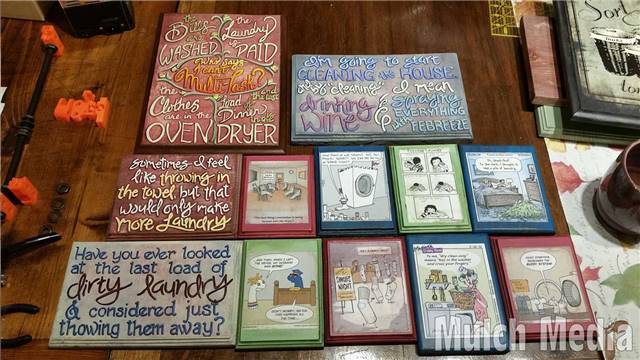
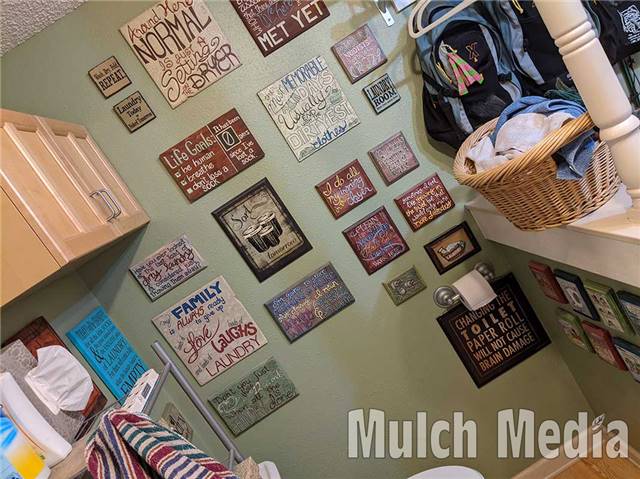
Another batch done. Only five more signs to go. The comics are printed though I plan to brush some paint on them.
I've purchased a few prints and a couple of completed signs but it looks like I will have painted and/or assembled a total of 42 signs (plus the "LAUNDRY" letters)!
 Subscribe